You can now connect your LoopCV account directly to ChatGPT using MCP (Model Context Protocol), allowing you to access your job searches, applications, and other LoopCV actions directly inside ChatGPT.
Follow the steps below to complete the setup.
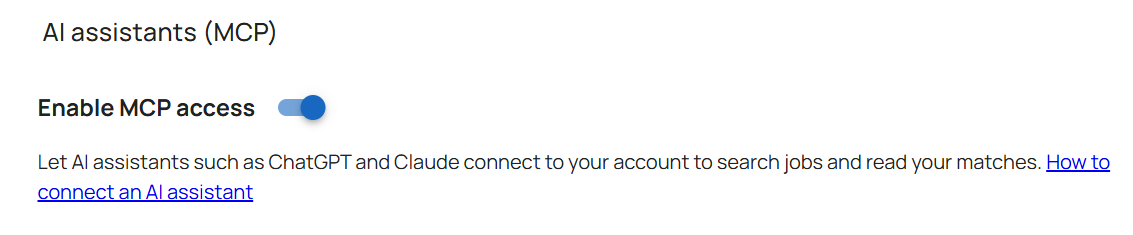
Step 1: Enable the MCP On your Account Settings
Step 2: Open ChatGPT Settings
In your ChatGPT account:
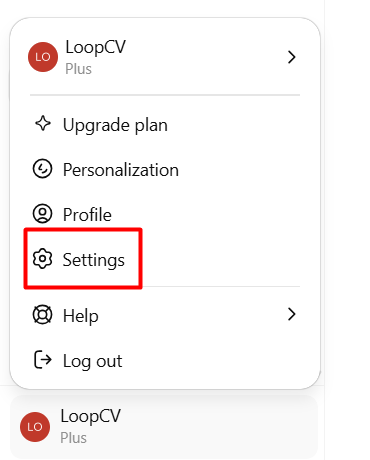
Click on your profile picture in the bottom-left corner.
Select Settings.
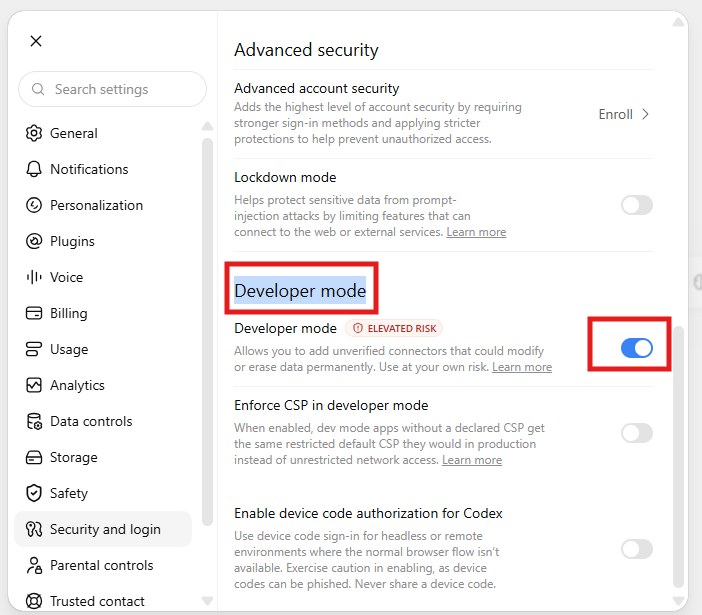
Navigate to Security and login
Scroll down to Developer mode and enable the toggle (Developer mode)
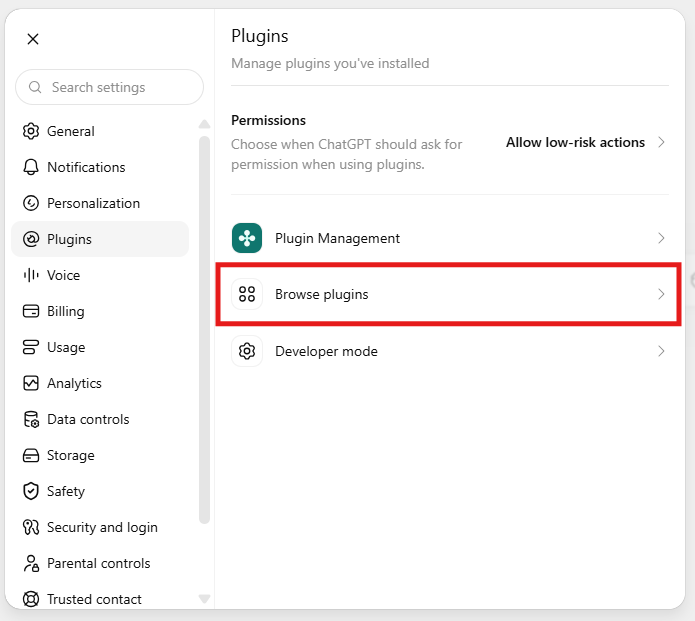
Go to Plugins.
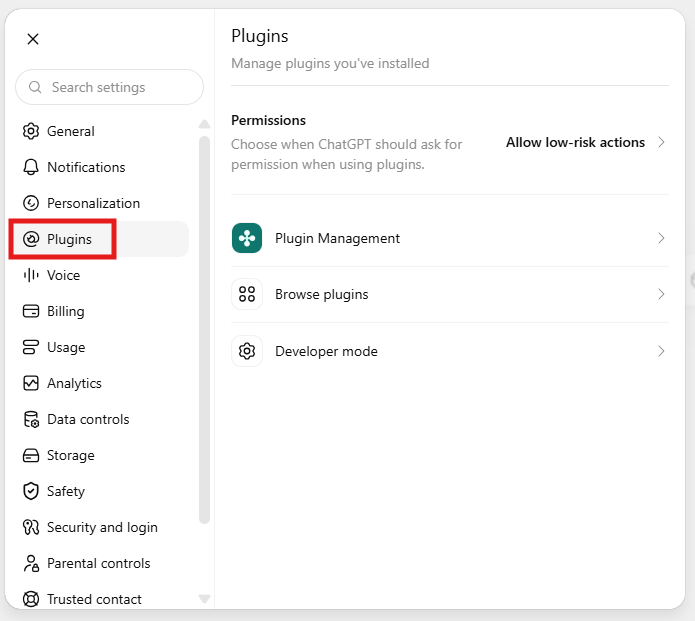
Click on Browse plugins.
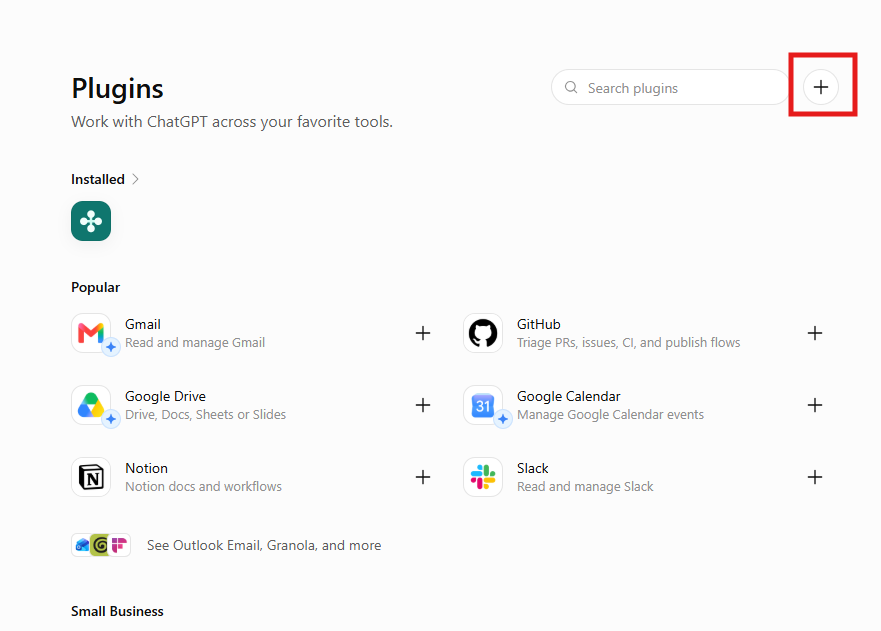
Click on “+”.
Step 3: Create the LoopCV Plugin
Once Developer Mode is enabled, enter the following details:
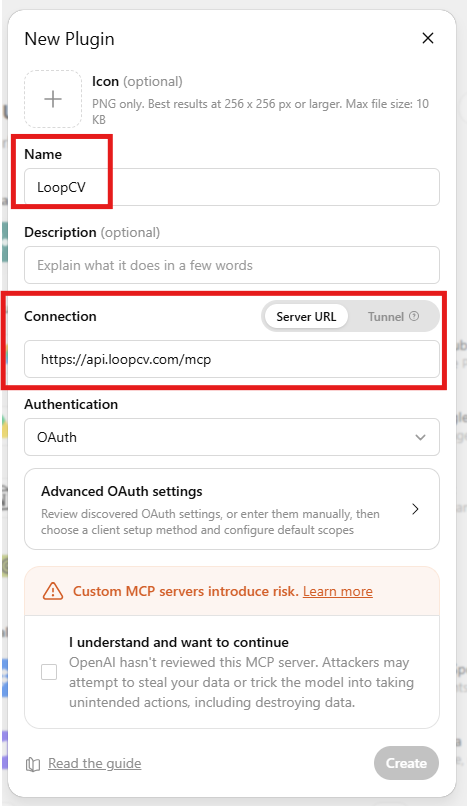
Name:
LoopCV
Connection (Server URL):
Authentication:
OAuth
Step 4: Configure OAuth Settings
Click Advanced OAuth Settings and enter the following:
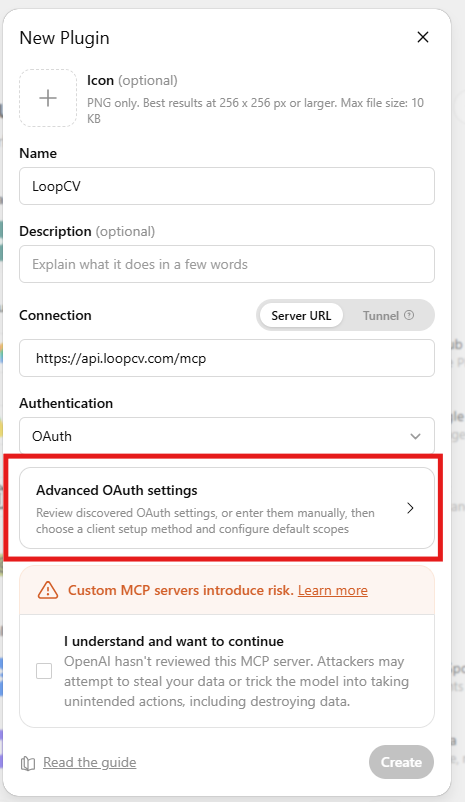
Select: User-Defined OAuth Client
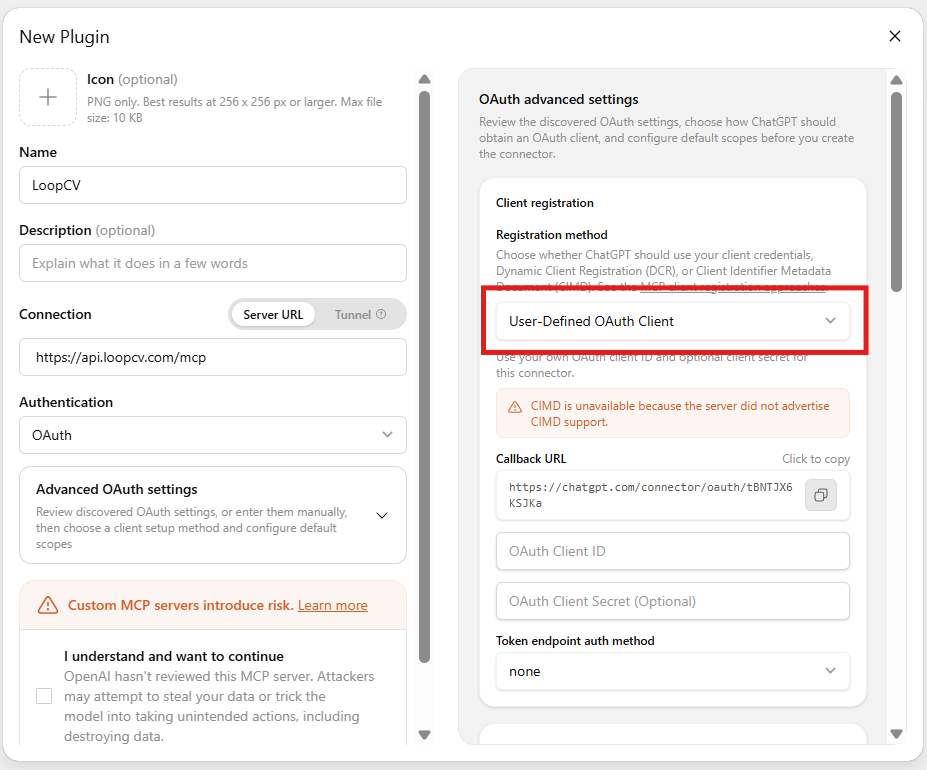
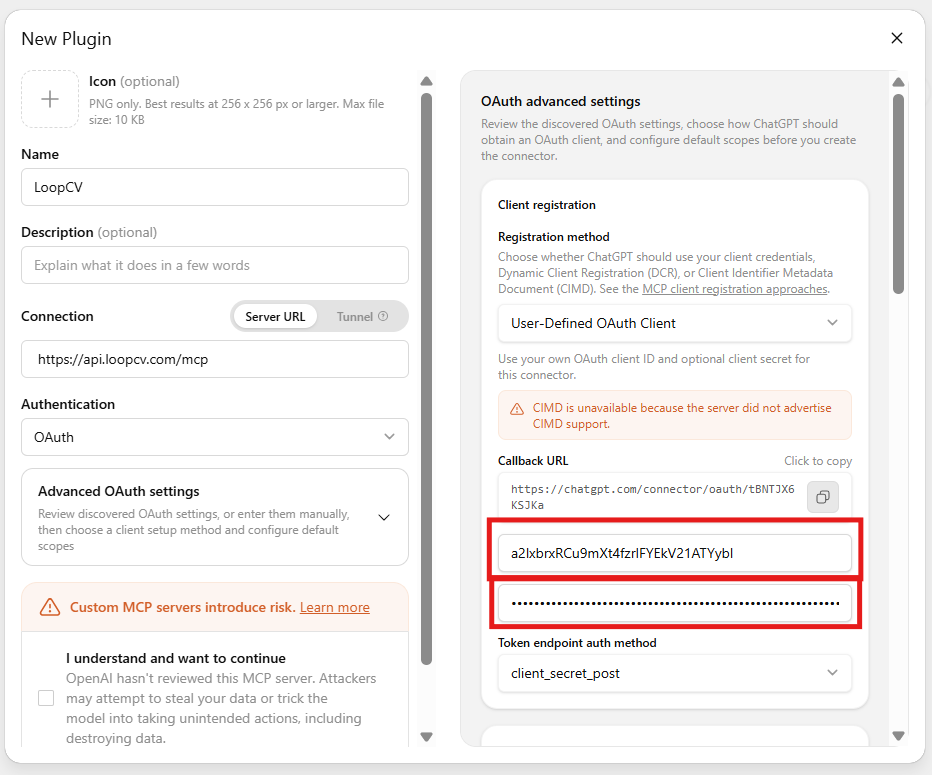
OAuth Client ID
a2lxbrxRCu9mXt4fzrlFYEkV21ATYybl
OAuth Client Secret
4FclqO7sHPPmZs-JVO-4cvfWaqwjUH31aiARW_YIdkF9XEWHdXATw8KTSBovEEpH
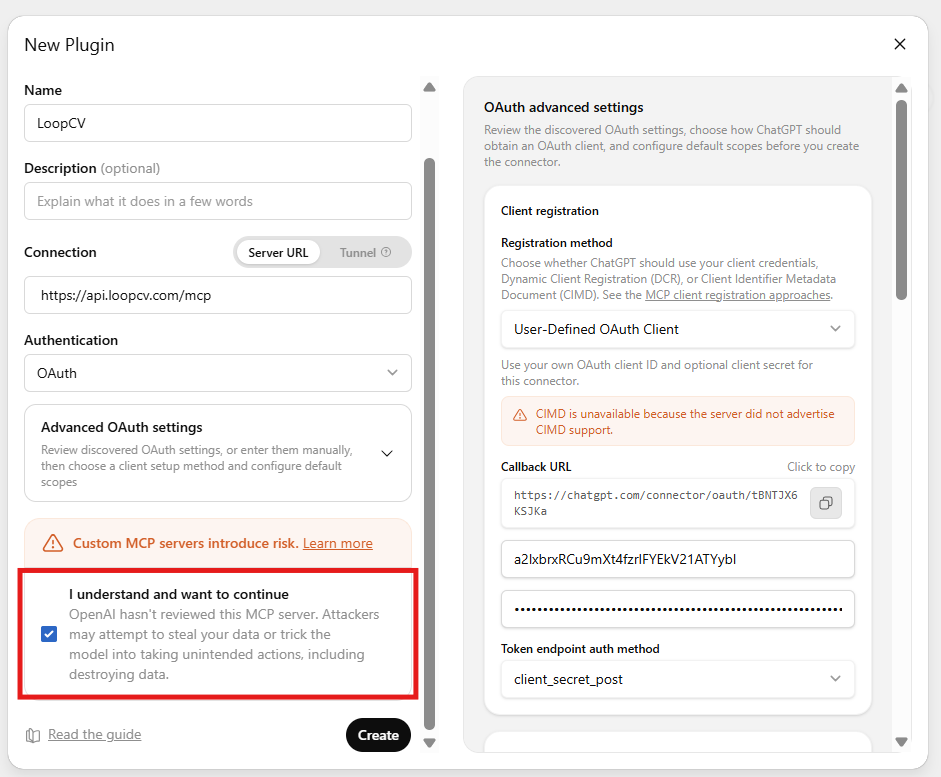
Enable the consent button “I understand and want to continue” and click Create.
Step 5: Sign in with your LoopCV account
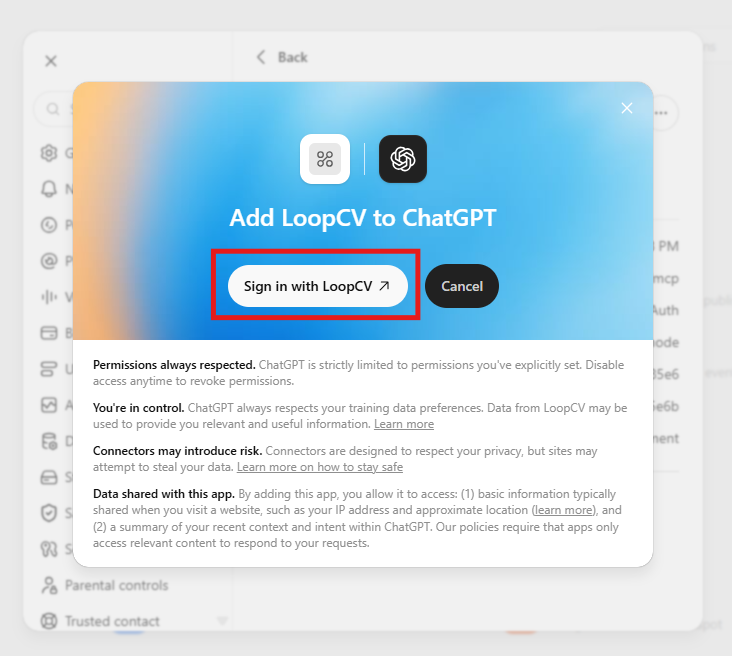
After clicking Create to enable the plugin, you will be asked to authorize the connection.
Simply click Sign in with LoopCV enter your LoopCV login credentials (email and password).
Step 6: Start using LoopCV inside ChatGPT
You are now ready to use LoopCV inside ChatGPT:
Open a new chat.
Click the + button and type “LoopCV”.
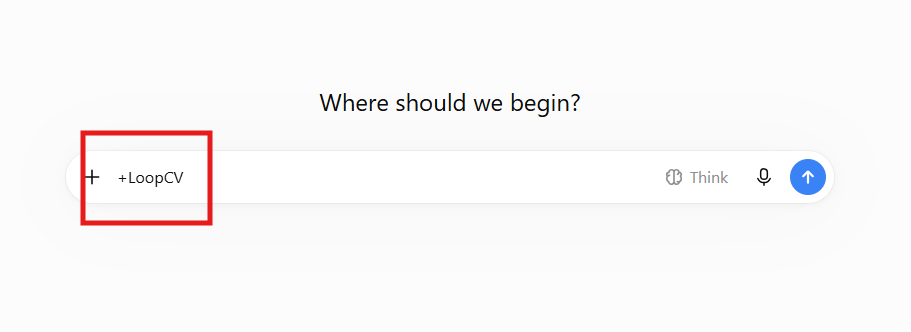
Select LoopCV.
Start typing.
Your LoopCV account is now connected and ready to use. You can search results across your account or create new loops.
Contact support@loopcv.com for more information.
Was this article helpful?
That’s Great!
Thank you for your feedback
Sorry! We couldn't be helpful
Thank you for your feedback
Feedback sent
We appreciate your effort and will try to fix the article